The result of the code above isn't very exciting (text and an orb), so...
TRY THIS...
This is easy! Just SELECT an area in the form above, TYPE IN (or COPY and PASTE) your changes, and click the "SEE THE RESULTS" button.
1. CHANGE THE BACKGROUND COLOR
More
BODY BGCOLOR="#FFFFFF"
In the BODY tag ( 1 ), change the color code for white (FFFFFF) to FFFF00 (yellow). (NOTE: Use zeros - not the capital letter "O".)
Then, open up a COLOR CHART and try some different colors.
Back to Top
2. CHANGE THE TEXT
More
Enter your text here
Between the FONT tags ( 3 ), replace "Enter your text here" with anything you want. Go crazy.
Back to Top
3. CHANGE THE FONT SIZE
More
SIZE="4"
In the FONT tag ( 3 ), change the font size from 4 to 7.
Then experiment with numbers from 1 (smallest) to 7 (largest).
Back to Top
4. CHANGE THE FONT COLOR
More
COLOR="#000000"
In the FONT tag ( 3 ), change the color code for black (000000) to any color you want. Use the COLOR CHART and experiment with font and background colors.
Back to Top
5. CHANGE THE FONT STYLE
More
FACE="arial, helvetica"
In the FONT tag ( 3 ), just remove the FACE tag entirely. This will give you the default font style of Times (for Macintosh) or Times New Roman (for Windows).
Back to Top
6. INSERT A NEW PICTURE
More
<IMG SRC="orb.jpg" WIDTH=100 HEIGHT=100 BORDER=0>
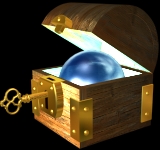
In the IMAGE tag ( 5 ), change the file name "orb.jpg" to "castle.gif" (Note the change from a .jpg to a .gif file). Then change the WIDTH and HEIGHT sizes as shown under the sample picture (castle.gif) below (these pictures are already saved in the same folder as your web page).
THEN... play with the WIDTH and HEIGHT sizes and see what happens. Return them to the proper sizes when you are finished playing.
Back to Top
7. INSERT A SECOND PICTURE
More
<IMG SRC="imagename.gif" WIDTH=00 HEIGHT=00 BORDER=0>
SELECT and COPY an entire image tag (from the form or the line above) and PASTE it under the first image tag ( 5 ).
NOTE: Be sure to insert another line break <BR> above your new image tag so that it appears on a new line (under) your first picture.
Now, change the file name (imagename.gif ?) to "orb-box.jpg" and change the WIDTH and HEIGHT sizes as shown under that sample picture (orb-box.jpg) below.
Back to Top
8. MAKE A "FLOATING" PICTURE
More
BODY BGCOLOR="#FFFFFF"
After you have inserted either the castle.gif or orb-box.jpg image (See No. 6 and 7. above), change the background color in the BODY tag ( 1 ) to black (000000) (Note: these are zeros - not the capital letter "O").
Cool, huh?
Back to Top
9. PUT AN IMAGE IN THE BACKGROUND
More
BGCOLOR="#FFFFFF"
Find the section in the BODY tag ( 1 ) that designates the background color (as shown above). SELECT and DELETE it completely.
Replace it with the following:
BACKGROUND="snow.gif"
"snow.gif" is the image shown below. The BACKGROUND tag takes an image and repeats it as many times as necessary to fill your browser window. Therefore, the image you use must be designed to have edges that fit together without leaving a "seam". (NOTE: Images used for the background do not need the WIDTH and HEIGHT tags.)
Back to Top
10. MAKE YOUR TEXT A LINK
More
Find the word(s) within your section of text ( 3 ) that you want to make a link (example: text).
IN FRONT OF THE WORD(S), put:
<A HREF="linkpage.htm">
The file name of the page that these words will be linked to is "linkpage.htm"
AFTER the word(s), put:
</A>
Your text link should look like this:
<FONT FACE="arial, helvetica" SIZE="4" COLOR="#000000">
Enter your <A HREF="linkpage.htm">text</A> here
</FONT>
When you "SEE THE RESULTS" - click on your text link.
Back to Top
11. CHANGE THE TEXT LINK COLORS
More
LINK="#FF0000"
To change the color your text will become when you make it a link, change the color codes in the BODY tag ( 1 ) for LINK from FF0000 (red) to anything you want (see: COLOR CHART)
VLINK="#0000FF"
To change the color your text will become AFTER you visit the link, change the color codes in the BODY tag ( 1 ) for VLINK (visited link) from 0000FF (blue) to anything you want (see: COLOR CHART)
You can also try our COLOR SELECTOR.
Back to Top
12. MAKE A PICTURE A LINK
More
<IMG SRC="imagename.gif" WIDTH=00 HEIGHT=00 BORDER=0>
Find the IMAGE TAG ( 5 ) that you want to make a link (any one will do) and treat it like a section of text that you made a link (No. 10 above).
IN FRONT OF THE COMPLETE TAG, put:
<A HREF="linkpage.htm">
The file name of the page that the picture will be linked to is "linkpage.htm"
AFTER the image tag, put:
</A>
EXAMPLE: A picture link (for the "orb.jpg" picture) should look like this:
<A HREF="linkpage.htm">
<IMG SRC="orb.jpg" WIDTH=160 HEIGHT=150 BORDER=0></A>
When you "SEE THE RESULTS" - click on your picture link.
For more information, see: BUILDING A WEB PAGE
Back to Top
|
 The form below contains some basic HTML code. To see how it is translated into a web page, just click the "SEE THE RESULTS" button.